By Fiona Carlson
Hi friends, I’m so excited to join Stacey Lee Creative for her fifth Annual Quilt Donation Drive Blog Hop.

As part of her Annual Quilt Donation Drive, Stacey teams up with Comfort Cases, a nationwide non-profit organization that serves children entering the foster care system in all 50 states. Their mission is to bring dignity and hope by replacing trash bags with personal care packages that include essential items such as:
- Backpacks
- Toiletries
- Pajamas
- Blankets
- Stuffed animals
Your quilt donation will go directly to Comfort Cases and will be included in one of their care packages.
How to Participate in the Quilt Donation Drive
-
Choose a Quilt Pattern (such as the one shared in this tutorial!)
-
-
- Use high-quality fabrics—the kind you’d choose for your own children or grandchildren. This ensures each recipient feels cherished and loved.
-
-
Document Your Donation
-
-
- Download and complete the Comfort Cases Note HERE.
- Take a photo of your quilt alongside the completed note.
-
Each handmade quilt counts as one entry into the giveaway (see prizes here).
-
-
Enter the Giveaway (Optional)
-
-
- Submit your quilt photos to enter the giveaway (enter giveaway here)!
-
-
Send Your Quilt to Comfort Cases
-
-
- Mail your quilts, accompanied by the Comfort Cases Note, to Comfort Cases.
-

-
-
- Your quilts will be added to a comfort case
-
Scrappy Rainbow “I Spy” Baby and Kid Quilt Tutorial
For my contribution to the Blog Hop, I am sharing a quick and fun tutorial to make a Scrappy Rainbow “I Spy” quilt in the two sizes needed for the quilt drive. Not only does this tutorial make an adorable quilt that will surely inspire hours of “I Spy” fun, it’s also guaranteed to help you bust some scraps.
So– let’s dive in!
Before you begin pulling fabrics, you will need to decide which size quilt you would like to make. There are two sizes needed for the Quilt Donation Drive:
BABY (36" x 36") | KID (49.5" x 49.5")

Both sizes will use the same layout (shown above); cut piece sizes will vary.
Pulling Scraps for Fussy Cutting

The first step is to simply go through your scrap bins and pull out any fabrics you think might work. Try to find fabrics with cute images that you can fussy cut. If you’re unfamiliar with the term, I define fussy cutting as: Intentional cutting to highlight an aspect, image, or motif of a given fabric. It’s totally ok to use multiple fussy cuts from the same fabric! Most fussy cut friendly fabrics have lots of options to choose from.

If you have a fussy cut ruler, this can be really helpful to check if a graphic is going to fit within the seam allowance. The Baby size uses 2 1/2" fussy cuts, and the Kid size uses 3 1/4" fussy cuts.

There are lots of great options for fussy cutting rulers, however, taping off the size you need with Washi tape on a regular ruler works just as well, and you won’t need to buy anything to do it!

Continue working your way through your scraps, and don't forget to look through your precut fabrics such as mini charm squares, which work for the baby size, and charm squares from which you can cut pieces for both Baby and Kid sizes.
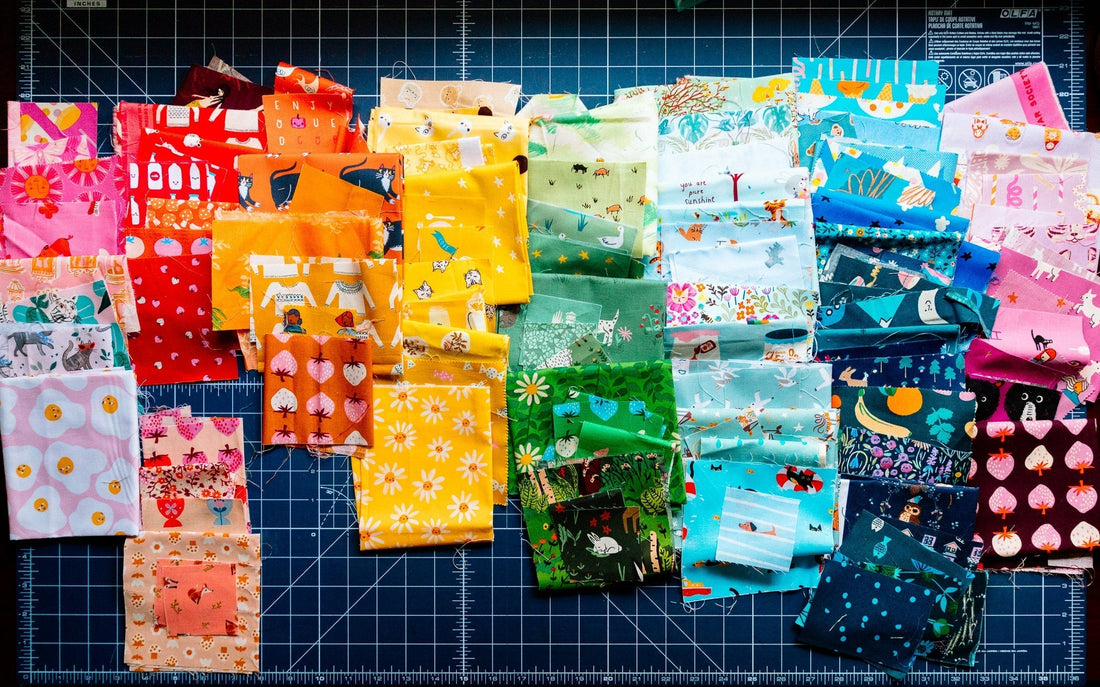
Once you've pulled out all the fabrics you think might work, sort them into color families: Pinks, Reds, Oranges, Yellows, Greens, Teals, Light Blues, Mid / Dark Blues, Purples. You'll quickly see if you have more of one color family than another.

If you don’t have this full range of colors in your stash, feel free to play with your own rainbow or ombre, focusing on the diagonals as you plan. You can also choose to just go fully scrappy and mix and match colors throughout your quilt. This is your creation, so take this tutorial and make it your own.
Once you’ve decided which fabrics you’d like to use, fussy cut your squares following the cutting table below.

Finally, cut all Background pieces, also following the cutting table above.
Make Patchwork Units
Now that you’ve got all your fabrics cut, it’s time to sew your Fabric 1-9 squares into Patchwork Units (PW Units).


To make your Patchwork Units (PW Units), pin and sew RST two fussy cut squares to make Unit 1. Repeat with a second set of fussy cut squares to make Unit 2, as shown below. Follow arrows for pressing. Pin and sew RST Unit 1 to Unit 2. Press seam open.

Repeat with all sets of (4) fussy cut squares to make the total number of PW Units needed. See table above.
Laying It All Out
Now that you’ve finished your PW Units, it’s time to lay out your quilt. Following the image below, lay out your PW Units alternating with Background squares into quilt top. Move any PW Units or BG squares that feel out of place, then take to your sewing machine to piece your quilt top!

Pin and sew RST into rows, as shown. Press toward the Background squares. Then, pin and sew RST rows into quilt top, nesting seams. Press long seams open.

That's it, you did it!
Quilt and Gift Your Quilt
Quilt and bind using your preferred methods. Don’t forget to take a picture of your quilt to enter the Giveaway, and remember to fill out the Comfort Cases form to include with your quilt.

*DISCLAIMER: This finished version of the Scrappy Rainbow "I Spy" Baby quilt uses one less row than the Comfort Cases Baby quilt layout shared in this tutorial.
Thank you so much for joining me today! Please tag me on Instagram @mommyandmequiltco if you make your own Scrappy Rainbow "I Spy" Baby or Kid quilt, I'd love to share your work.
Until next time!
Xoxo,
Fiona
PS Once you’ve finished your Comfort Cases quilt, come back and make another Scrappy Rainbow “I Spy” quilt! These make for great baby shower gifts, and your own kiddo will surely love having their own, too. If you'd like to increase the size, simply add rows either to the right side or the bottom.